The Woocommerce plugin is the perfect solution to receive credit and debit card payments in WordPress. Follow our tutorial and in a few minutes you will have your payment button active and functional, besides bank cards it allows you to receive gift cards and balance Payphone from your customers using our app.
Steps to integrate the plugin
Para recibir pagos con nuestro gateway solo debes seguir estos sencillos pasos:
Create your account Payphone Business and set it up
Installing the Payphone plugin on your Wordpress site
Configure the plugin
Start charging
Video Tutorial
In the following video you can see how in just a few minutes you can integrate our plugin
Configuración del ambiente
To implement the payment button, it is necessary to meet certain requirements, which are divided into two categories: Business Requirements and Development Requirements.
Business Requirements:
El establecimiento que recibirá los pagos debe estar registrado en Payphone Business. Para iniciar el proceso de registro, puedes hacer click aquí.
Once your store is active, you will need to create a "developer" type user, of which we will provide more details later.
Development Requirements:
It is necessary to configure your development environment in our portal "Payphone Developer". Here you can obtain all the authentication tokens needed to identify yourself in the services of Payphone.
Create developer user
Log in to your Payphone Business account with your RUC, email and password.
Go to the "Users" section and select "Create User".
Complete the form by entering all the required data and make sure to select the "Developer" role.
With the developer user created, you are ready to start the implementation.
Page Payphone Developer
Setting up the development environment at Payphone allows you to manage and monitor all transactions made through the platform efficiently. Follow these steps to get started:
The development applications of Payphone allow you to configure connection parameters, test users and manage your environment(test and production). In addition, they provide you with the necessary credentials for authentication, such as token and StoreID.
Start Creating the Application To begin, click on the "+ Add" button located at the top of the page.
Completa el Formulario de Creación Se abrirá un formulario en el que deberás ingresar la información de tu aplicación. A continuación, se detallan los campos que debes completar:
Nombre: Define un nombre que identifique claramente tu aplicación.
Descripción: Añade una breve descripción de la funcionalidad o propósito de tu aplicación.
Categoría: Selecciona la categoría que mejor corresponda a tu perfil de negocio.
Plataforma de Desarrollo: Elige la plataforma donde está desarrollada tu aplicación. Si no aparece la opción exacta, selecciona la más similar.
Tipo de Aplicación: Para integrar el botón de pagos, asegúrate de seleccionar el tipo WEB.
Dominio Web: Introduce la URL de tu sitio web. Es importante solo el dominio registrado puede acceder al botón de pago de Payphone. Si intentas abrir la «cajita de pagos» desde otro dominio, el acceso será bloqueado.
URL de Respuesta: Proporciona la URL a la que se redirigirá al usuario una vez finalizada la transacción. En esta URL se adjuntarán los parámetros necesarios para obtener el detalle completo de la transacción realizada.
Después de completar todos los campos, presiona el botón Guardar.
Once your application is created, you will get the necessary credentials to access our APIs.
Go to the top menu and select the Credentials tab.
You will see the token and the button that takes you to the list of stores, where you will find your StoreID. Both have a button to copy them easily.
Install and configure plugin
Perfect, with your application created we can start the configuration in WordPress. Remember that you must already have the Woocommerce plugin installed. Go in your WordPress dashboard to the plugins section, then Add New and look for the Payphone plugin.
To configure your button you must provide the obtained token, enter the PayPhone settings in the plugins section and enter the obtained token:
Note: The StoreID field must be empty, unless you have multiple branches created in your Payphone Business store.
If you manage branches enter the Sotre ID which is obtained from the PayPhone Developer web page, in the Company Application section, Actions column, Store List. If you do not manage branches leave the field empty.
Remember to configure your woocommerce store so that the charge is according to your billing type, that you have configured the VAT or 0% rate according to the requirements of your company.
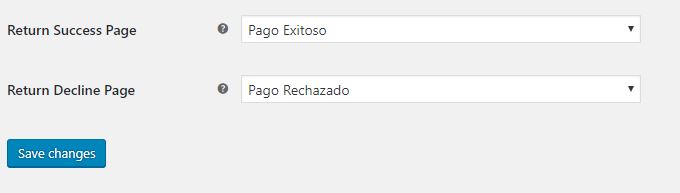
Finally, configure the pages to which PayPhone should go when the payment is successful or rejected:
After saving the changes your plugin will be ready to trade.
Testing and production
Como ya te hemos comentado en Payphone todo el control lo tienes tú, y eres tú quien decide cómo ejecutar las pruebas y pasar a producción. No necesitas ningún proceso de certificación y puedes publicar tu mismo sin problema. Acá te damos una guía.
Tu aplicación creada en la página de Payphone Developer cuenta con dos ambientes pre establecidos que son «PRUEBAS» y «PRODUCCIÓN«. Cuando ingresas en la configuración de tu aplicación desde nuestro sitio de Developers puedes seleccionar el ambiente que necesites.
En pruebas todas tus transacciones serán aprobadas pero no se conectaran las transacciones a ningún procesador bancario, por lo que puedes usar tus tarjetas y no se realizará ningún cobro, o cualquier Visa o Mastercard valida.
En ambiente de producción el comportamiento es el mismo, pero si se realiza la conexión bancaria por lo que las transacciones ya son reales y cuentas con tu botón de pago activo.
With your application in production the process is complete, congratulations for integrating your Woocommerce plugin.